VIM and Python – An alliance made in heaven
Table of contents
I consider it my duty to tell you about the only real Python development environment that you will ever need: VIM.
That's right. VIM is ubiquitous and fast, and it never fails. It can also do almost anything!
However, on the other hand, configuring VIM can be difficult, but don't be afraid. In this article, we will show you how to set up a powerful VIM environment so that it is focused on daily work with Python..
Installation
Since VIM comes pre-installed on a number of *nix systems, let's first check if it is installed:
$ vim --version
If it is installed, you should see something like:
VIM - Vi IMproved 7.3 (2010 Aug 15, compiled Nov  5 2014 21:00:28)
Compiled by root@apple.com
Normal version without GUI.  Features included (+) or not (-):
-arabic +autocmd -balloon_eval -browse +builtin_terms +byte_offset +cindent
-clientserver -clipboard +cmdline_compl +cmdline_hist +cmdline_info +comments
-conceal +cryptv +cscope +cursorbind +cursorshape +dialog_con +diff +digraphs
-dnd -ebcdic -emacs_tags +eval +ex_extra +extra_search -farsi +file_in_path
+find_in_path +float +folding -footer +fork() -gettext -hangul_input +iconv
+insert_expand +jumplist -keymap -langmap +libcall +linebreak +lispindent
+listcmds +localmap -lua +menu +mksession +modify_fname +mouse -mouseshape
-mouse_dec -mouse_gpm -mouse_jsbterm -mouse_netterm -mouse_sysmouse
+mouse_xterm +multi_byte +multi_lang -mzscheme +netbeans_intg -osfiletype
+path_extra -perl +persistent_undo +postscript +printer -profile +python/dyn
-python3 +quickfix +reltime -rightleft +ruby/dyn +scrollbind +signs
+smartindent -sniff +startuptime +statusline -sun_workshop +syntax +tag_binary
+tag_old_static -tag_any_white -tcl +terminfo +termresponse +textobjects +title
 -toolbar +user_commands +vertsplit +virtualedit +visual +visualextra +viminfo
+vreplace +wildignore +wildmenu +windows +writebackup -X11 -xfontset -xim -xsmp
 -xterm_clipboard -xterm_save
   system vimrc file: "$VIM/vimrc"
     user vimrc file: "$HOME/.vimrc"
      user exrc file: "$HOME/.exrc"
  fall-back for $VIM: "/usr/share/vim"
Compilation: gcc -c -I. -D_FORTIFY_SOURCE=0 -Iproto -DHAVE_CONFIG_H -arch i386 -arch x86_64 -g -Os -pipe
Linking: gcc -arch i386 -arch x86_64 -o vim -lncurses
At this stage, you want to check two things:
- The VIM version must be higher than 7.3.
+pythonit should appear in the list of functions so that you know that Python is supported.
If both of these checks are passed, go straight to VIM extensions. If not, then it's time to install/update.
macOS / OS X
Take Homebrew, if you don't have it yet, and run:
$ brew update
$ brew install vim
*NIX / Linux
For Debian or Ubuntu, you can try:
$ sudo apt-get remove vim-tiny
$ sudo apt-get update
$ sudo apt-get install vim
As for other Linux versions, check out the documentation in your package manager. Here is a link to help you get started: Install Vim..
Окна
There are many different ways to install VIM on Windows. Start with official documents.
Checking VIM installation
Make sure that you have installed VIM > 7.3 with Python support. Run vim --version again to verify this. If you want to test a specific version of Python used in VIM, run :python import sys; print(sys.version) from VIM:
2.7.6 (default, Sep  9 2014, 15:04:36)
[GCC 4.2.1 Compatible Apple LLVM 6.0 (clang-600.0.39)]
This should output your current Python version. If you get an error message, it means you don't have Python support, and you need to either reinstall or recompile if you're building from source.
After installing VIM, let's see how to configure VIM for Python development.
VIM Extensions
VIM can do many of the things developers need right out of the box. However, it also has a lot of extensibility, and there are some pretty interesting extensions that make it more like a “modern” IDE. The very first thing you need is a good extension manager.
Note: Extensions in VIM are often called packages or plugins.
Вундл
There are several extension managers in VIM, but I highly recommend one of them - Vundle. Think of it as pip for VIM. This makes it easier to install and update packages.
Let's install the Vundle:
$ git clone https://github.com/gmarik/Vundle.vim.git ~/.vim/bundle/Vundle.vim
This command downloads the Vundle plugin manager and places it in your VIM bundles directory. Now you can manage all extensions from .vimrc configuration file.
Add the file to your user's home directory:
$ touch ~/.vimrc
Now configure the Vundle in your .vimrc by adding the following to the beginning of the file:
set nocompatible              " required
filetype off                  " required

" set the runtime path to include Vundle and initialize
set rtp+=~/.vim/bundle/Vundle.vim
call vundle#begin()

" alternatively, pass a path where Vundle should install plugins
"call vundle#begin('~/some/path/here')

" let Vundle manage Vundle, required
Plugin 'gmarik/Vundle.vim'

" add all your plugins here (note older versions of Vundle
" used Bundle instead of Plugin)

" ...

" All of your Plugins must be added before the following line
call vundle#end()            " required
filetype plugin indent on    " required
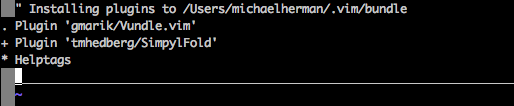
That's all. You are now set to use the Vundle. After that, you can add the plugins you want to install, then launch VIM and run:
:PluginInstall
This command makes Vundle work wonders — download all the plugins and install/update them for you.
Note: If you are a Windows user, check out Windows Installation Instructions.
Let's create an IDE
We would not be able to list all the features of VIM, but let's look at a short list of some powerful ready-made functions that are ideal for Python development.
Throw away the mouse
Probably the most important feature of VIM is that it does not require a mouse (except for the graphical variants of VIM). This may seem like a terrible idea at first, but after you take the time— and it really takes some time — to learn the keyboard shortcuts, you'll speed up the entire workflow!
Split layouts
If you open a file using :sp <filename>, you split the layout vertically (opening a new file under the current file). If you swap the keys to :vs <filename>, you will get a horizontal split (opening a new file to the right of your current file).

You can also insert dividers, so you can create dividers inside the dividers, horizontal and vertical, as you wish. As we all know, when developing, we often have to view multiple files at the same time.
Professional advice #1: Make sure to use the tab completion feature to find files after typing. :sp.
Professional advice #2: You can also specify the different areas of the screen where splits should occur by adding the following lines to the .vimrc file:
set splitbelow
set splitright
Professional advice #3: Do you want to navigate between the dividers without using the mouse? If you just add the following to .vimrc, you can switch between the divisions with just one key combination:
"split navigations
nnoremap <C-J> <C-W><C-J>
nnoremap <C-K> <C-W><C-K>
nnoremap <C-L> <C-W><C-L>
nnoremap <C-H> <C-W><C-H>
Keyboard shortcuts:
- Ctrl+J go to the section below
- Ctrl+K go to the section above
- Ctrl+L move to the right separator
- Ctrl+H move to the left separator
In other words, press Ctrl plus the standard VIM move key to navigate to a specific panel.
But wait — what's the point nnoremap? In a nutshell, nnoremap converts one keyboard shortcut into another. The no part means reassigning the key in normal mode, not in visual mode. Basically, the nnoremap <C-J> <C-W><C-j> says that in normal mode, when I click <C-J>, do <C-W><C-j> instead. More detailed information can be found here.
Buffers
While VIM can create tabs, many users prefer buffers and delimiters. You can imagine the buffer as a recently opened file. VIM provides easy access to the latest buffers. Just type :b <buffer name or number> to switch to an open buffer. (Auto-completion works here too.) You can also use :ls to display a list of all buffers.
Professional advice #4: At the end of the output :ls VIM will issue a request with Hit enter to continue. Instead, you can type :b <buffer number> and select the buffer immediately while the list is still being displayed. This will save you keystroke time, and you won't have to memorize the buffer number.
Code folding
Most “modern” IDEs provide the ability to collapse (or collapse) methods and classes, showing you only the class/method definition lines instead of the entire code.
You can include this in .vimrc using the following lines:
" Enable folding
set foldmethod=indent
set foldlevel=99
This works fine, but you need to type za to fold (and unfold). The space bar would be much better. Therefore, add this line to your file as well. .vimrc:
" Enable folding with the spacebar
nnoremap <space> za
Now you can easily hide the parts of your code that you are not currently working on.
The initial command, set foldmethod=indent, creates folds based on line margins. However, this often results in creating more folds than you really want. But don't be afraid! There are several extensions that try to fix this. We recommend SimpylFold. Install it using the Vundle by adding the following line to .vimrc:
Plugin 'tmhedberg/SimpylFold'
Note: Do not forget to install the plugin - :PluginInstall.
Professional advice #5: Try this if you want to see the documentation lines for the collapsed code:
let g:SimpylFold_docstring_preview=1
Indentation in Python
Of course, in order for code folding to work based on indentation, you want your indentation to be correct. Again, VIM is slightly behind the standard because it does not handle automatic indentation after defining a function. You can do two things with indentation:
- Set the margins according to the PEP 8 standards.
- Improve the handling of automatic indentation.
БОДРОСТЬ духа 8
To add the appropriate indentation for PEP 8, add to your .vimrc:
au BufNewFile,BufRead *.py
    \ set tabstop=4
    \ set softtabstop=4
    \ set shiftwidth=4
    \ set textwidth=79
    \ set expandtab
    \ set autoindent
    \ set fileformat=unix
This will allow you to use the standard four spaces when pressing the tab key, make sure that the line length does not exceed 80 characters, and save the file in Unix format so that you do not have problems with conversion when uploading to GitHub. and/or share share them with other users.
To develop a full stack, you can use a different command au for each file type:
au BufNewFile,BufRead *.js, *.html, *.css
    \ set tabstop=2
    \ set softtabstop=2
    \ set shiftwidth=2
So you may have different settings for different file types. There is also a plugin called ftypes that will allow you to create a separate file for each file type for which you want to save settings, so use it if you see fit.
Automatic creation of margins
Plugin 'vim-scripts/indentpython.vim'
Marking unnecessary spaces
You also want to avoid unnecessary spaces. You can mark it in VIM to make it easy to detect, and then delete it:
au BufRead,BufNewFile *.py,*.pyw,*.c,*.h match BadWhitespace /\s\+$/
This will mark the extra spaces as invalid and probably color them red.
UTF-8 support
For the most part, you should use UTF-8 when working with Python, especially if you are working with Python 3. Make sure that VIM is aware of this with the following line:
set encoding=utf-8
Automatic completion
The best Python autocomplete plugin is YouCompleteMe. Again, use the Vundle to install:
Bundle 'Valloric/YouCompleteMe'
In fact, YouCompleteMe uses several different auto-completion tools (including Jedi for Python), and some C libraries must be installed to work correctly. The documentation has very good installation instructions, so I won't repeat them here, but be sure to follow them.
It works pretty well, but let's add a few settings:
let g:ycm_autoclose_preview_window_after_completion=1
map <leader>g  :YcmCompleter GoToDefinitionElseDeclaration<CR>
The first line ensures that the autocomplete window disappears when you're done with it, and the second defines a shortcut to jump to the definition.
Note: My leading key is bound to a space, so space-g will determine where I am at right now. This is useful when I'm learning new code.
Virtualenv support
One of the problems with the goto definition above is that VIM doesn't know anything about virtualenv by default, so you should inform VIM and YouCompleteMe about your virtualenv by adding the following lines of code to .vimrc:
"python with virtualenv support
py << EOF
import os
import sys
if 'VIRTUAL_ENV' in os.environ:
  project_base_dir = os.environ['VIRTUAL_ENV']
  activate_this = os.path.join(project_base_dir, 'bin/activate_this.py')
  execfile(activate_this, dict(__file__=activate_this))
EOF
This determines if you are working inside virtualenv, switches to that specific virtualenv, and then adjusts your system path so that YouCompleteMe finds the appropriate site packages.
Syntax checking/highlighting
You can ask VIM to check your syntax every time you save using the syntastic extension.:
Plugin 'vim-syntastic/syntastic'
Also add the PEP 8 check with this nifty little plugin:
Plugin 'nvie/vim-flake8'
Finally, put your code in order:
let python_highlight_all=1
syntax on
Color schemes
The color schemes work in combination with the basic color scheme that you are using. Check solarized for GUI mode and Zenburn for terminal mode:
Plugin 'jnurmine/Zenburn'
Plugin 'altercation/vim-colors-solarized'
Then just add some logic to determine which scheme to use depending on VIM mode:
if has('gui_running')
  set background=dark
  colorscheme solarized
else
  colorscheme zenburn
endif
Solarized also comes with dark and light themes. To simplify switching between them (by pressing F5), add:
call togglebg#map("<F5>")
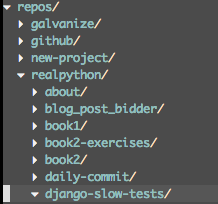
Viewing files
If you need a proper file tree, then NERDTree is what you need.:
Plugin 'scrooloose/nerdtree'
If you want to use tabs, use vim-nerdtree-tabs:
Plugin 'jistr/vim-nerdtree-tabs'
Do you want to hide .pyc files? Then add the following line:
let NERDTreeIgnore=['\.pyc$', '\~$'] "ignore files in NERDTree
Super search
Do you want to find something mostly from VIM? Check CtrlP:
Plugin 'kien/ctrlp.vim'
As expected, pressing Ctrl+P activates the search, so you can just start typing. If the search results show anything close to the file you are looking for, the program will find it. And this applies not only to files: the program will also find tags! To learn more, watch this video on YouTube.
Line numbering
Enable line numbers to be displayed on the side of the screen using:
set nu
Integration with Git
Do you want to run basic git commands without leaving VIM? Then vim-fugitive is what you need:
Plugin 'tpope/vim-fugitive'
See it in action on VIMcasts.
Power transmission line
Powerline is a status bar that displays options such as the current virtualenv, git branch, editable files, and more.

It is written in Python and supports a number of other environments such as zsh, bash, tmux and IPython:
Plugin 'Lokaltog/powerline', {'rtp': 'powerline/bindings/vim/'}
Check out all the configuration parameters in the official documentation.
System Clipboard
Vim usually has its own clipboard and ignores system keyboards, but sometimes you may need to cut, copy, and/or paste to/from other non-VIM applications. On OS X, you can access the system clipboard using this line:
set clipboard=unnamed
VIM in shell
Finally, once you get comfortable with VIM and its keyboard shortcuts, you will often be annoyed by the lack of the same keyboard shortcuts in the command shell. Don't worry: most command shells support VI mode. To enable it for your shell, add the following line to ~/.inputrc:
set editing-mode vi
Now you can use VIM keyboard shortcuts not only in the shell, but also in the Python interpreter and any other tool that uses GNU Readline (most database shells). Now VIM is everywhere!
Conclusion
That's more or less it (at least for Python development). There are many other extensions that you can use, as well as alternatives to everything described in this post. Which extensions do you like the most? How did you set up VIM to match your personality?
Here is a link to my current configuration VIM. Do you have the same? Please share it!
Thanks for reading!
Resources
- VIM Tutor comes with VIM, so once VIM is installed, just type
vimtutorat the command prompt, and the program will teach you how to use VIM, and, using VIM. - VIMcasts are tutorial videos that describe how to use many of VIM's features.
- Official VIM Documents
- Open Vim
- The Learn Vimscript the Hard Way app is ideal for learning vimscript.